45 twill tape labels tutorial
stamped twill tape | Little Birdie Secrets - Blogger favorite tutorials; crochet; quilting; disclosures; Wednesday, April 21, 2010 ... Twill tape's also great for making labels for your own handsewn stuff - I use iron-on transfers then cut the tape into strips, sew them in and voila, your own brand! April 21, 2010 at 6:53 AM 4 Creative Ways to Label a Quilt - Suzy Quilts To start, cut a piece of freezer paper and light-colored fabric slightly larger than a standard piece of printer paper (in the US, that's 8 1/2" x 11"). Place the freezer paper shiny side down on top of the fabric. The freezer paper will stick a bit. With an iron on the cotton setting, press the freezer paper onto the fabric until it sticks ...
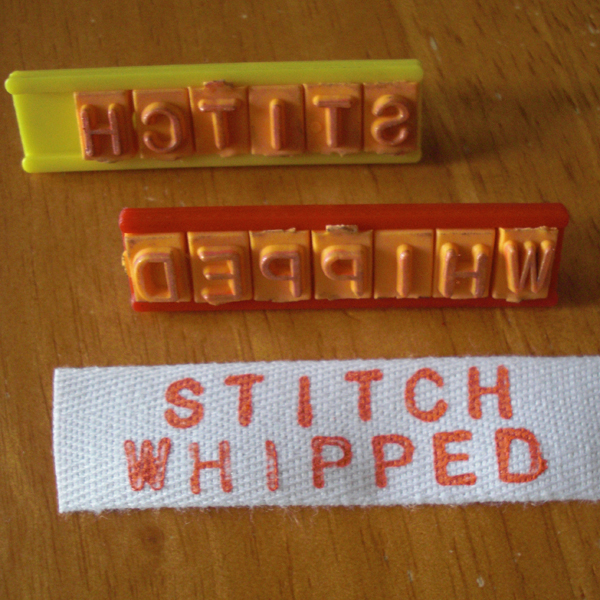
Twill Tape & Fabric Ink Stamped DIY Labels - Swoodson Says How to make diy clothing labels from twill tape and fabric ink with tiny stamps. This is a cheap way to label clothes that you sew! How to make diy clothing labels from twill tape and fabric ink with tiny stamps. ... Tips & Tutorials. Post navigation. Free jingle bird softie sewing pattern. 20+ Free Sewing Projects for Men's Gifts.

Twill tape labels tutorial
DIY Fabric Labels on Twill Tape - Pinterest DIY Fabric Labels on Twill Tape How to make your own DIY fabric labels by printing directly onto twill tape! All you need is an inkjet printer, card stock, masking tape, twill tape, and ... Jennifer Maker ️ DIY Home Decor + Craft + Paper Flowers 207kfollowers More information Make your own sew-in labels - Sew What, Sherlock? The center of the iron needs to be fully on the label. If you do it in a whole line like that you're just going to get bubbles and smears. Let the ribbon cool before you move on to the next step. 4. Place your label centered on the ribbon. Set the iron down on the transfer. Do not move the iron. Do not push down. The Tulip Patch: Twill tape quilt labels...DIY Twill tape quilt labels...DIY For months I have mentally stored this tutorial just waiting for a time when I had t-shirt transfer paper and twill tape and a bit of time. This is a fabulous idea and I wanted to share the tutorial and my results with y'all. I printed some on white twill tape and the rest on natural twill tape.
Twill tape labels tutorial. DIY Printable Fabric Labels - You Make It Simple How To Apply DIY FABRIC Labels to Your Sewing Projects / 5 Simple Methods Watch on Sew the label into the seam of the project. Fold the label strip in half and with the raw edges of the ribbon facing out past the seam allowance as shown in the picture above. Topstitch around the edge of the label using a small zigzag stitch on your sewing machine. All about twill tape - Best Fabric Store Blog Twill tape has those diagonal lines, and they form a sort of zigzag. It's really strong, and that makes it great for a whole lot of uses. Twill tape can be made from cotton or synthetic fibers. As you can see in the photo above, it comes in various widths and colors. Mostly, I found it in white, natural and black. DIY Custom Fabric Tags - Tiny Curl Crochet STEP 1 - Prepare your label design file. This step will differ based on the size of your label and the orientation of your design. For the purpose of this tutorial, I'll describe my process. I use a 3/8" cotton twill ribbon and a horizontal orientation. I fold my labels in half so "TINY" is on the front and "CURL" is on the back. Tutoria Upgrade- Making Your Own Labels the Smarter, Faster Way! Instead of cutting my ribbon or twill tape, I just ironed 5-6 onto the ribbon at a time. SO much faster! It keeps them way more organized for storage and cuts down on the amount of ribbon wasted. I've included the (extremely popular) original tutorial beneath for convenience, but with fewer steps, since I'm getting smarter.
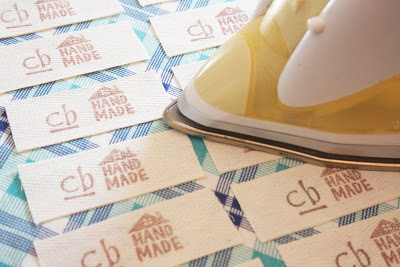
How to Make Fabric Labels Video Tutorial - Easy Sewing For Beginners Take one of your labels and place it printed side down onto the cotton tape or ribbon. Ensure you have your label on a solid heat proof surface and not an ironing board. An ironing board will be too soft. Slowly iron the label onto the cotton tape or ribbon, holding in one position for 3-4 seconds before moving the iron on. Step 6 Tutorial to Transform Twill Tape - The Patriotic Quilter Open a new document and type in the phrase you would like to have on your twill tape. I like to use Powerpoint because you can do a "landscape" document. For this pinnie, the length of tape you need is right around 8 inches, so you can do it "portrait" style with 8.5" wide paper in Word. Once you have typed in your phrase, start playing with fonts. DIY Fabric Labels on Twill Tape - Jennifer Maker DIY Fabric Labels Step-by-Step Tutorial. Step 1: Print out the DIY fabric label template (Design #8) onto a piece of card stock — you'll find it in my resource library (get the password to it by filling out the form at the bottom of this post). Step 2: Cut out your twill tape to 8″ long strips. (If your twill tape is wrinkled, iron it first.) Tutorial: DIY twill tape labels for clothes you sew - Sewing Tutorial: DIY twill tape labels for clothes you sew December 16, by Anne Weaver. Leave a Comment Why should you put labels in the clothes you sew? For the same reason that manufacturers put them in the clothes they sell. They tell who made the garment, or what size it is, or what kind of fabric it's made from.
PatchworkPottery: Fabric Labels Tutorial - Blogger ribbon (I used 1/2 inch natural cotton twill tape) iron & ironing board scissors Step 1: Design your image using your program of choice working with a resolution of 300ppi for a clear image. The height of your image should be smaller than the width of your ribbon. Print some out on regular paper, cut them out and see how they fit on your ribbon. Make Your Own Sewing Labels · How To Make A Packaging Labels - Cut Out 1 Light Fabric Iron On Transfer paper Cotton Twill Tape Flat Iron Step 1 Start by typing up a document with your word choice in whatever font you would like. Don't worry about spacing, you will be cutting out each logo so just make sure they don't overlap and then put as many on one page as you can. 8 Ways How to Make Fabric Labels - Peek-a-Boo Pages She also has tips for a couple of ways to attach them. 5. Make easy iron-on labels with this tutorial from here at Peek-a-boo Pages. 6. This tutorial from Victory Patterns uses a Xylene blender marker to transfer ink on to labels. 7. Little Blue Boo uses iron-on transfer paper to make tag-less labels. 8. One more from here at PAB: Make iron-on ... Handmade Twill Tape Labels & A June Dress - Inspiration Made Simple I made my daughters birthday outfit (Birthday is in 2 months!) and wanted to put a little stamp of "hey, I did that!" on it, so I needed a label, and the ones I had printed up were loop labels and wouldn't look right on the skirt. I grabbed some gray twill tape, my Cricut, the "logo" I designed, freezer paper and paint and made this:
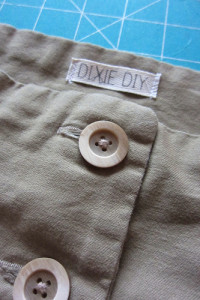
April – 2012 – Dixie DIY - Page 2
DIY: transfer clothing labels - Victory Patterns 100% Cotton fabric or 1" twill tape; Xylene blender marker from your art store; Scotch tape; Thread _____ Cut your paper tags from the downloadable sheet _____ Tape down your fabric or twill tape with right side facing up. Place your paper tag facing downwards, so the writing faces the right side of the fabric. Make sure to center the position ...

Twill Fabric Labels one-inch ribbon cut and by inkedpapers
7 Unique DIY Clothing Labels - Mabey She Made It This tutorial for stamping your twill tape clothing labels is another great way to make your labels. It's simple, cost effective, and you only need some very basic supplies like twill tape, fabric ink, and your stamps to create them.

A Day In 1862...: Fun with twill tape labels
5 Ways to Make Your Own Fabric Labels - Crafting a Green World Make it greener: Using iron-on transfers for your labels allows you greater flexibility with the material. Try using 100% organic cotton bias tape or twill tape from Near Sea Naturals available in a variety of widths. Carina's Craftblog has a cute label tutorial using a self-inking DIY stamp.

8 Ways to Make Your Own Fabric Labels - Peek-a-Boo Pages - Patterns, Fabric & More!
Modern Quilt Labels and Quilt Tags - Needlepointers.com On this page, we have links to a wide variety of tutorials to help you create a unique label or quilt tag, as well as links to find preprinted and iron-on labels. ... Homemade craft label tutorial using a T-shirt transfer kit, twill tape, a printer and an iron. Sew and the City. Printable Quilt Labels. Quilt labels which can be printed on fabric.

7 Unique DIY Clothing Labels • Mabey She Made It
Twill Tape Week: Printing on Twill Tape - crafterhours Carefully tape the edges down, keeping an eye on how your twill tape is lined up with your template. And be prepared to do this repeatedly, because depending on how your particular printer handles paper, it will likely line up horizontally but not necessarily vertically. Print. Peel the tape off. Iron to heat-set.

7 Unique DIY Clothing Labels | Mabey She Made It
Twill Tape Week: Got 10 Minutes to Spare? - crafterhours Line up strips of twill tape on a bristol board or thin cardboard backing and stitch down the edges. Put the backing in the frame without the glass. If you need a safe spot to keep the glass for later use, put it between the twill tape/cardboard layer and the easel back.

All about twill tape - Best Fabric Store Blog
Titchy Tips: Top Ten Uses for Twill Tape - Craftstorming Twill tape is perfect to use for drawstring on waistbands and cuffs. You need to fold over the ends about 1cm twice and then sew them down. It would also work well for drawstring bags or anywhere else you might want to use drawstring. 5. Tags and labels Plain twill tape can be used for tags for holding up tea towels and pot holders.
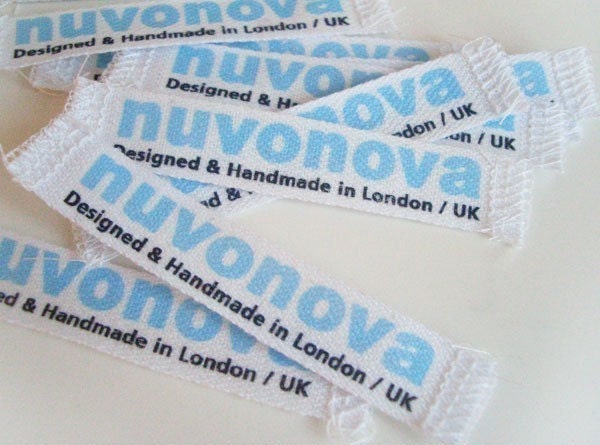
25 Custom Printed Fabric Labels White Twill Tape by nuvonova
craftyblossom: fabric labels :: a tutorial Fold the ends back at least 1/4 inch and press Get out the Heat n' Bond and cut 1 inch strips One side is a smooth paper, and the other side is a rough adhesive. Cut to the length of your label and iron with steam the rough side of the Heat n' Bond to the back of your label.

Custom Printed Twill Tape | Personalized clothing labels, Custom print, Printed tape
10 uses for twill tape in your sewing projects - Sewing Laura from Craftstorming shares her 10 favorite uses for twill tape in her sewing projects. Some are more traditional uses, like reinforcing seams. But with the wide range of colors and sizes available now, you can also put twill tape to more creative use. Go to Craftstorming to read Laura's favorite ones. Looking for more sewing patterns ...

DIY Sew-In Fabric Labels
The Tulip Patch: Twill tape quilt labels...DIY Twill tape quilt labels...DIY For months I have mentally stored this tutorial just waiting for a time when I had t-shirt transfer paper and twill tape and a bit of time. This is a fabulous idea and I wanted to share the tutorial and my results with y'all. I printed some on white twill tape and the rest on natural twill tape.

Learn how to print your own fabric labels onto twill tape using your inkjet printer -- perfect ...
Make your own sew-in labels - Sew What, Sherlock? The center of the iron needs to be fully on the label. If you do it in a whole line like that you're just going to get bubbles and smears. Let the ribbon cool before you move on to the next step. 4. Place your label centered on the ribbon. Set the iron down on the transfer. Do not move the iron. Do not push down.
Make Your Own Clothing Labels » Dollar Store Crafts
DIY Fabric Labels on Twill Tape - Pinterest DIY Fabric Labels on Twill Tape How to make your own DIY fabric labels by printing directly onto twill tape! All you need is an inkjet printer, card stock, masking tape, twill tape, and ... Jennifer Maker ️ DIY Home Decor + Craft + Paper Flowers 207kfollowers More information

SewNso's Sewing Journal: DIY Labels!
7 Unique DIY Clothing Labels | Mabey She Made It

How-Tuesday: Make a Quilt Label - Etsy Journal
Post a Comment for "45 twill tape labels tutorial"